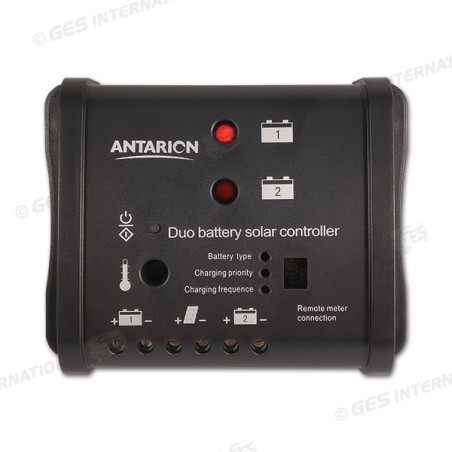
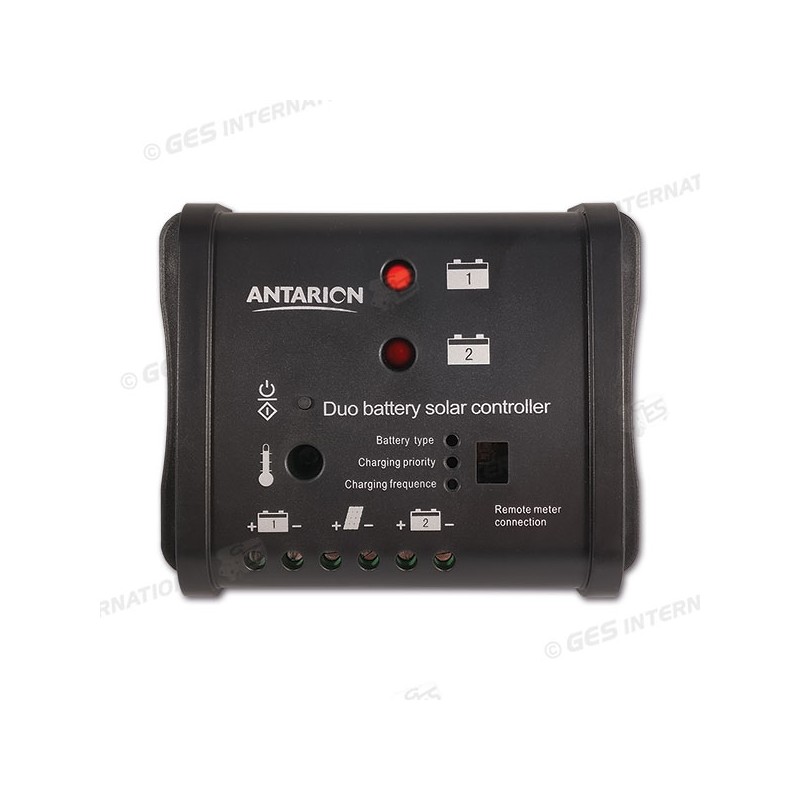
ELECTRICAL CONNECTIONS
DO NOT let the cables coming from the solar panel touch each other.
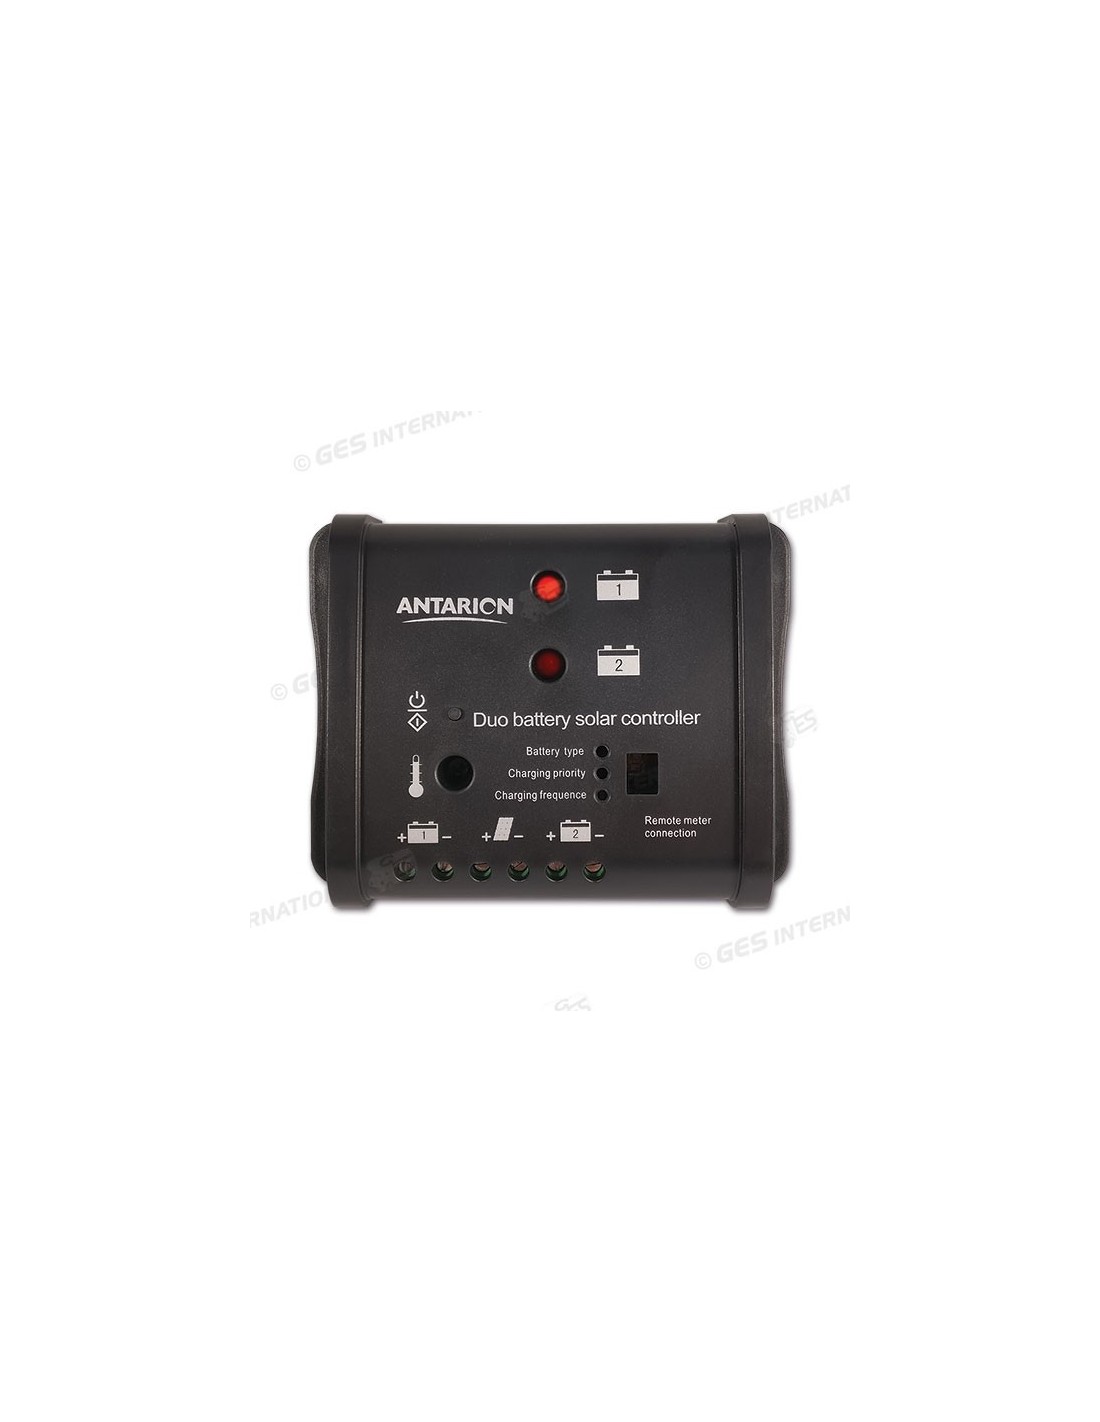
• Step 1: Connect two 4/6 mm² cables to the control unit to the terminals marked with the battery symbol, respecting the polarities, then connect to the battery. The thickness of the cables must be suitable for the current in play. It is advisable to use 6 mm² cables.
Recommendations: it is advisable to place a fuse on the positive wire near the battery with an amperage higher than the nominal current of the control unit (30A).
IMPORTANT: If the connection phases are reversed, the product may be damaged.
• Step 2: insert two cables of adequate cross-section into the + and – terminals of the control unit, marked with the solar panel symbol, then connect to the respective polarities of the solar panel.
ATTENTION
If the solar panel is exposed to the sun or light source, electricity is automatically generated. Please pay attention.
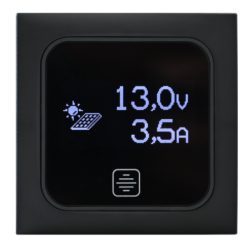
The terminals with the light bulb symbol are for connecting a dummy load to test the operating status (do not connect).
PRECAUTIONS FOR USE
• During operation the charge controller will generate heat, it is recommended not to cover to allow ventilation.
• It is very important that the battery is charged at least once a month, otherwise it may be damaged.
• The battery cannot be charged if the energy generated by the solar panel is less than the energy being consumed.
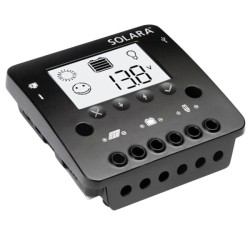
LED FUNCTIONS
• Led Batteries :
- Fast flashing of the LED indicates that the panel is short circuited.
- Slow flashing of the LED indicates that the battery is charged
- Steady LED light indicates that the panel is charging
- Flashing at regular intervals every 2/3 seconds indicates that the battery is connected but is not charging (e.g. the solar panel
- does not provide enough energy)
- LED off indicates that the battery is disconnected or overloaded
• Temperature LED:
- High temperature warning LED of the charge regulator electronics
CONFIGURATION AND SETTING FOR REGULATOR OPERATION
Selecting the connected battery:
Press and hold the button for 5 seconds, then position yourself, by pressing the same button, on the LED corresponding to the function
to change (Battery type).
When the number on the display starts flashing, press the button and select the battery type corresponding to the number of
reference.
1 – AGM battery (factory value)
2 – GEL Battery
3 – Free Acid Battery
To confirm your choice, hold down the button for 5 seconds.


